
Sliding Window Object Detection: How It Works, SAHI vs Sliding Window
 Sergey SychUpdated
Sliding window inference runs a detector on overlapping tiles of a large image to find small objects. Learn how it works, SAHI vs sliding window, and setup.
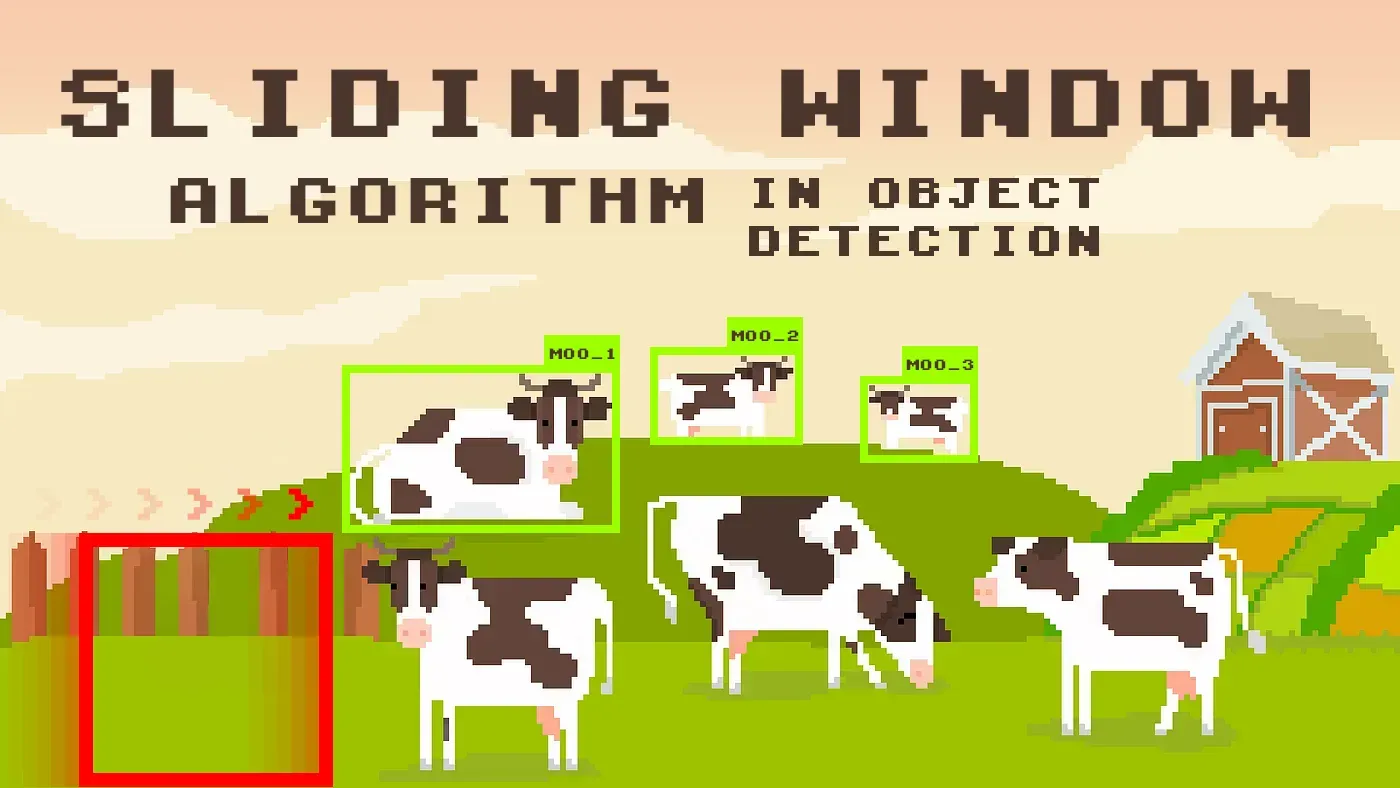
Sliding window object detection runs a detector on small, overlapping tiles of a large image instead of on the whole image, then merges the results. It helps find small and densely packed objects that a detector misses at full-image resolution. Supervisely has it built in as an inference mode for any detection model.
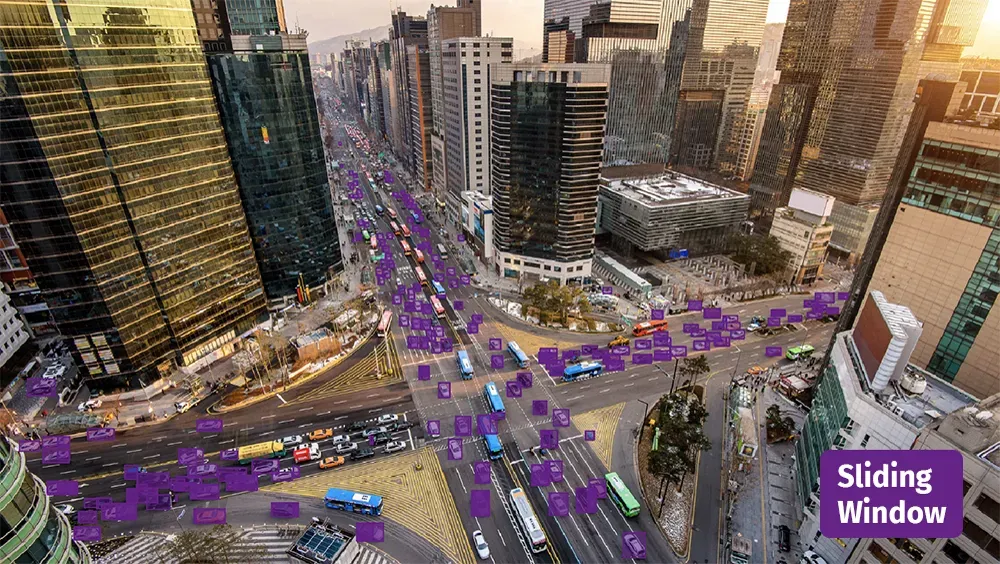
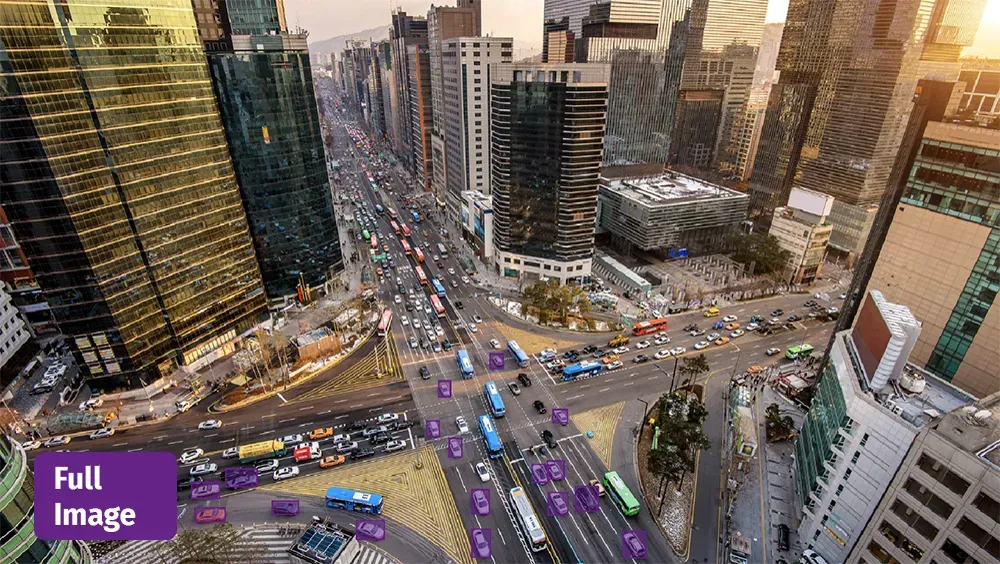
Below you will see how the method works, how it compares with SAHI, which strategies exist for the image borders, and how to run it with YOLOv8 in the Apply Neural Networks to Images Project app.
Video tutorial: sliding window inference in Supervisely
In this video you will learn how to configure, visualize and use sliding window inference in Supervisely with any object detection model.
What is sliding window in object detection?
The sliding window algorithm places a window of a fixed size, usually a square or rectangle, in the top-left corner of the image. The model analyzes the content inside it. Then the window moves a step to the right and the analysis repeats, row by row, until the whole image is covered. Neighbouring windows usually overlap, so that an object on a tile border is not missed.
The model effectively "reads" the image piece by piece, like a book line by line. Each piece gets the same analysis whatever the size of the full image, so images of different sizes are handled in one consistent way. The detections from all windows are then merged into one result for the whole image.
Why does sliding window help detect small objects?
Most detectors resize the input to a fixed resolution. On a large photo from a drone or a camera on a pole, a small object shrinks to a few pixels and the detector loses it. A tile is processed at a much higher effective resolution, so the same object covers more pixels.
The research on this idea shows how large the effect can be. In the SAHI paper (ICIP 2022), sliced inference alone raised average precision by 6.8% for FCOS, 5.1% for VFNet and 5.3% for TOOD on the VisDrone and xView aerial datasets. The numbers are for those detectors and datasets, so test the method on your own data before you rely on them.
SAHI vs sliding window: what is the difference?
They are close relatives. SAHI (Slicing Aided Hyper Inference) is an open-source Python library that implements sliced inference: it cuts the image into overlapping slices, runs your detector on each slice and merges the predictions. Sliding window is the general idea. SAHI is one implementation, and Supervisely's inference mode is another.
| SAHI | Sliding window in Supervisely | |
|---|---|---|
| Form | Open-source library, pip install sahi | Mode in the Apply NN to Images Project app |
| How you run it | Python code or the sahi predict command | Point-and-click, with a preview on one image before the full run |
| Models | Ultralytics, MMDetection, Hugging Face, torchvision and others, per its repository | Any detection model you deploy in Supervisely. The mode turns on if the connected network supports it |
| Extras | COCO slicing and evaluation tools, FiftyOne integration | Window size and overlap settings, three border strategies, a new project with predictions as output |
| Best for | Scripted pipelines and research code | Teams that want to run it on a whole project and review the result in the same platform |
Choose SAHI when you work in code or need its COCO tools. Choose the Supervisely mode when the images and predictions already live in a Supervisely project. The two are not exclusive: you can prototype in one and run at scale in the other.
A minimal SAHI call looks like this, with the 256x256 slices and 0.2 overlap used in the SAHI prediction docs:
from sahi import AutoDetectionModel
from sahi.predict import get_sliced_prediction

detection_model = AutoDetectionModel.from_pretrained(
    model_type="ultralytics",
    model_path="yolov8n.pt",
    confidence_threshold=0.3,
    device="cpu",
)

result = get_sliced_prediction(
    "large_image.jpg",
    detection_model,
    slice_height=256,
    slice_width=256,
    overlap_height_ratio=0.2,
    overlap_width_ratio=0.2,
)
result.export_visuals(export_dir="out/")
When to use sliding window and when not to
To use this method effectively, you need to know when it pays off and when it does not.
| When it's best to use 👍 | When not to use 👎 |
|---|---|
| Images with objects of the same class of different sizes This typically applies to images with perspective. In sliding window image processing, the model can analyze numerous small regions. Within these regions, objects of the same class may vary in size, although not as significantly as when considering the entire image simultaneously. When analyzing the entire image, objects in closer proximity can differ significantly in size from those from the farthest perspective, which can negatively affect object detection if not using sliding window. | Limited resources If you have limited computational resources, using a sliding window on large images may be too costly. |
| Images with complex scenes Where are hundreds / thousands of small objects, partially hidden or close together, have different orientations, positions. Or if the objects are located on the edges of the images. | Specialized architectures In some cases, specialized architectures (e.g., pyramidal networks, multi-scale networks with attentional multi-resolution, and so on) may be able to process images of different sizes more efficiently without using a sliding window. |
| Images of different sizes in the dataset When the images in the dataset come in all sorts of different sizes, using a sliding window can make it easier for the model to work with them. | Similar images If the images in your dataset are similar in size and objects have a constant scale, using a sliding window may be unnecessary. |
What sliding strategies are there for image borders?
When the window reaches the edge of the image, it may not fit. The algorithm can handle this in three ways.
Shift the window to fit the size
As the window with specified dimensions moves across the image, if its current position exceeds the image boundaries, the window is shifted to align to the nearest edge. This keeps the entire window inside the valid data area and prevents incomplete or out-of-bounds analysis.
Add padding to the image
Padding adds extra values (often zeros) around the image, increasing its dimensions. The window can then move across the image without edge problems.
Resize sliding window
The window moves over the image with a certain step. At the border it is resized to process only the remaining part of the image.
How to run sliding window inference in Supervisely step by step
What you need: a Supervisely project with images (the free Community Edition needs no credit card) and a GPU or CPU to serve a model. Supervisely runs in the cloud or on-premise, see Enterprise.
In the ecosystem there is a ready-made solution that walks through each image in your project and runs detection on it.
Serve YOLOv8 | v9 | v10 | v11
Deploy YOLOv8 | v9 | v10 | v11 as REST API service

Apply NN to Images Project
NN Inference on images in project or dataset
-
Deploy any model you prefer.
Supervisely supports many neural network frameworks for training and inference, such as MMDetection (train, serve), Detectron2 (train, serve), MMSegmentation (train, serve), YOLOv5 (train, serve) and YOLOv8 (train, serve).
Follow this tutorial to learn how to train and use a custom model. You can also use your own models with these apps.
Here we use the well-known YOLOv8. Launch Serve YOLOv8, then select a pre-trained model, the task type and the device.
-
Once the model is deployed, launch Apply NN to Images Project.
During startup, select the project. In the app interface select the deployed model and connect to it.
When the app starts, a preview with default settings appears: object detection on the whole image at once.
Object detection on the whole image at once -
Set the sliding window settings.
Select "Sliding Window" as the Mode, turn on "Preview" on the same image and look at the result.
Sliding window modeTo improve the result, change the window size and overlap. To choose the window size, watch the demo video in the "Sliding Window Inference Preview" section. It shows how much of the image one step captures with the current settings.
Adjusted sliding windowIn this example the window was too large and many sheep were caught in one pass. The window was reduced by 40% in dimensions, which improved detection quality a lot.
-
Click
Apply model to input data. The model runs on all project images in Sliding Window mode. At the end a new project with predictions is created.
For calling a deployed model from code, see the Prediction API docs.
Conclusion
Sliding window turns one hard detection problem on a large image into many easier ones on tiles. It costs more compute, so use it where small or crowded objects are the problem and keep a single pass for the rest. Related reading: one-shot detection with OWL-ViT, text detection with MMOCR and training a segmentation model on 62 labeled images.
Frequently asked questions
What is sliding window inference?
Sliding window inference runs an object detector on small overlapping tiles of a large image instead of on the whole image, then merges the detections from all tiles into one result. It is model-agnostic, so it works with any detector.
Why does sliding window help detect small objects?
Detectors usually resize the input to a fixed size. On a large image, a small object shrinks to a few pixels and is lost. A tile is processed at a much higher effective resolution, so the same object covers more pixels.
What is the difference between SAHI and sliding window?
SAHI (Slicing Aided Hyper Inference) is an open-source library that implements sliced inference, which is the sliding window idea with merging of overlapping predictions. It also ships COCO slicing and evaluation tools and a FiftyOne integration. In Supervisely, sliding window is a built-in inference mode with a visual preview.
How do I choose the window size and overlap?
Pick a window about as large as the area you want the detector to see at once, so objects look as they did in training. Add overlap so objects on tile borders are not cut. The SAHI documentation example uses 256x256 slices with 0.2 overlap as a starting point. Check the result on one image in preview and adjust.
When should I not use sliding window?
Skip it when compute is limited, when images are small, or when objects have a constant scale. Every tile is an extra model call, so inference on a large image takes many times longer than a single pass.
Can I use sliding window with YOLOv8 in Supervisely?
Yes. Deploy Serve YOLOv8, open the Apply NN to Images Project app, set the mode to Sliding Window, check the preview and apply the model to the project. Any other deployed detection model works the same way.