
How to Train a Smart Tool for Crack Segmentation in Inspection
 Valeria Vorozhko
Train a custom RITM smart tool for crack segmentation in inspection images, no code. Data, GPU setup, training and serving, tested on 70 unseen photos.
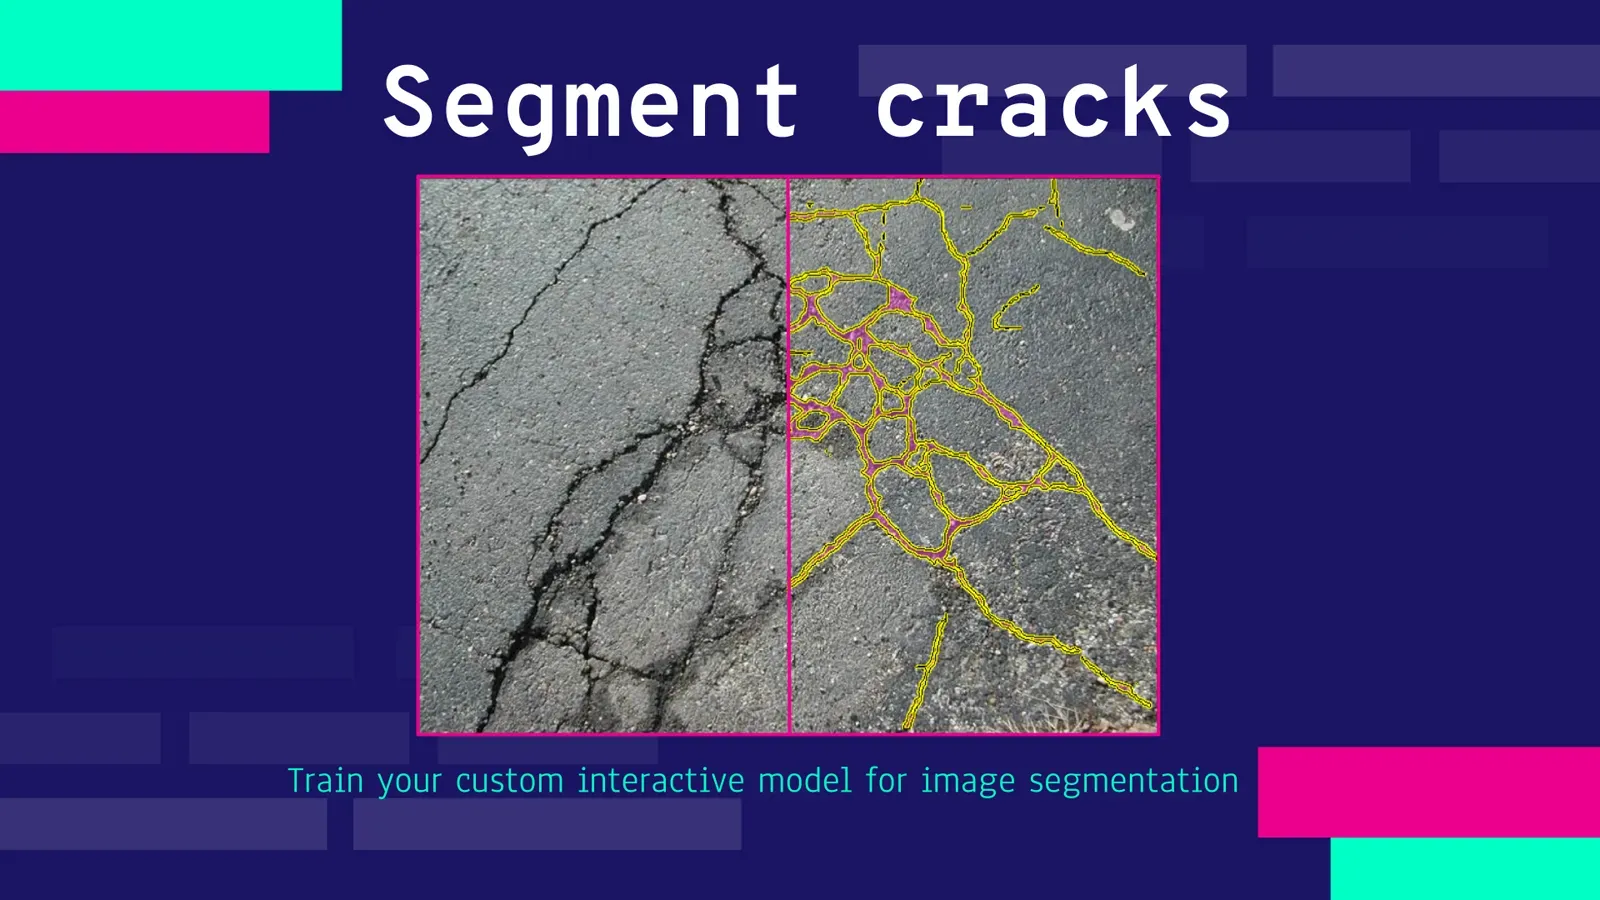
To segment cracks in industrial inspection images, train a custom interactive model such as RITM on your own annotated photos instead of relying on general pre-trained models, which often struggle with thin, irregular cracks. In Supervisely this needs no coding: a set of 628 annotated crack images, a connected GPU and two apps, with the AI-assisted labeling tools doing the rest.
Not every AI solution handles every situation, and one-fits-all models might not cut it for real inspection photos. The model you train here works as a Smart Tool inside the image labeling interface.
This blog post is the Part 1 in the series of posts where we share results of our experiments on leveraging synthetic training data to get the accurate and robust semantic segmentation model on very challenging tasks - cracks segmentation:
- Part 1. 👉 How to Train a Smart Tool for Crack Segmentation in Inspection
- Part 2. Synthetic Crack Segmentation Dataset: How We Built It
- Part 3. Synthetic Data for Segmentation: 7 Steps That Improved Our Model
- Part 4. Domain Adaptation with HRDA: Train on Synthetic Data
Custom crack model vs general-purpose models: when should you train your own?
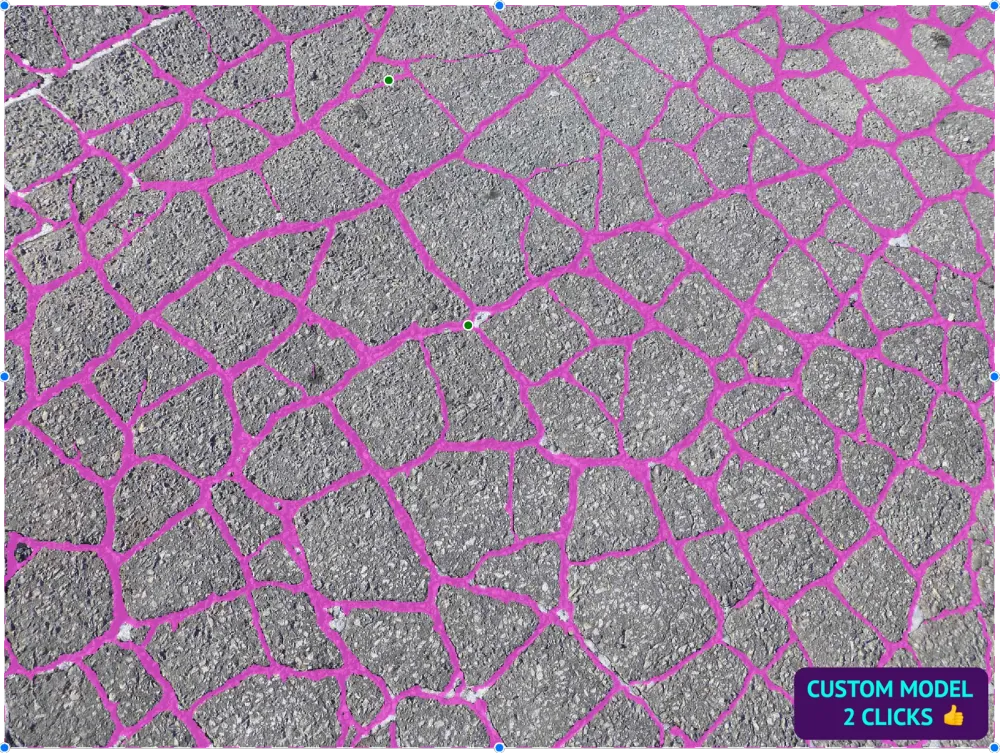
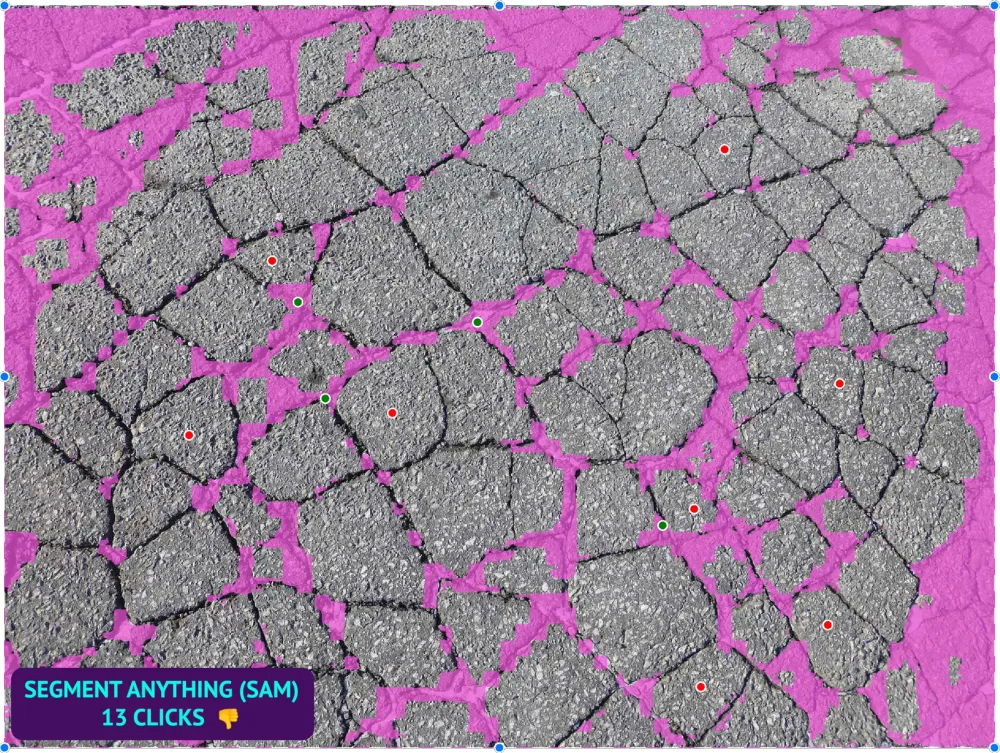
Segmentation of cracks in images feels like an almost unsolvable challenge for publicly available pre-trained AI models. Standard AI models available in the public domain often struggle to meet the complexity of this task. Luckily, Supervisely allows you to bypass the limitations of out-of-the-box models by training the model on custom dataset. Look what results can be achieved in Supervisely with no coding in less than one hour!
Where is crack segmentation used in industry?
Crack segmentation holds crucial significance for inspection tasks across a variety of industries beyond construction and infrastructure. Here are the examples:
-
In the aerospace industry, precise crack detection is vital for ensuring the structural integrity of aircraft components, preventing catastrophic failures during flight.
-
In the automotive sector, crack segmentation assists in identifying defects in critical parts such as engine components or chassis, guaranteeing the safety of vehicles on the road.
-
Crack segmentation is essential in the energy sector, helping to detect flaws in pipelines, pressure vessels, and power generation equipment, thereby averting leaks, explosions, or power disruptions.
-
In manufacturing, crack detection ensures the quality of products like electronic circuits, where even minor cracks can impair functionality.
-
Furthermore, crack segmentation finds relevance in the medical field, particularly in radiology, as it aids in diagnosing bone fractures and assessing the progression of diseases like osteoporosis.
Across all these diverse sectors, the accurate identification of cracks plays a pivotal role in maintaining safety, functionality, and efficiency.
Video tutorial
Through our comprehensive tutorial, we guide you step by step, demonstrating how to effortlessly build your own custom model for AI-assisted interactive crack segmentation on images.
Try to reproduce this tutorial yourself in our Community Edition for free.
For those who prefer written instructions over video, the text guide is provided below.
What is interactive segmentation?
Interactive segmentation is a semi-automated way for solving image segmentation task. The process begins with you selecting the specific area you want to focus on, known as the region of interest (ROI). To segment the object you're interested in, you place a green dot on it. Then, the computer uses these initial clues to automatically segment a dominant object within a chosen area. If the neural network makes mistakes, you can guide it by putting more positive (green 🟢) dots where your object is and negative (red 🔴) dots where there's no part you're interested in. This back-and-forth user-model interaction makes sure the segmentation is right!
Keep in mind that interactive segmentation is a semi-automated labeling technique, thus it can be applied only to a single image during the annotation. It's especially useful for tricky tasks like spotting cracks in complex images.
Data used for the experiment
For our training and testing, we'll be working with a carefully curated dataset that showcases the real-world complexity of cracks images. This dataset comprises a diverse range of surfaces, lighting conditions, and crack patterns, making it a true representation of the challenges we encounter in the field.
The training data consists of 628 of thoroughly annotated crack images, serving as the foundation for teaching our neural network to segment cracks accurately.
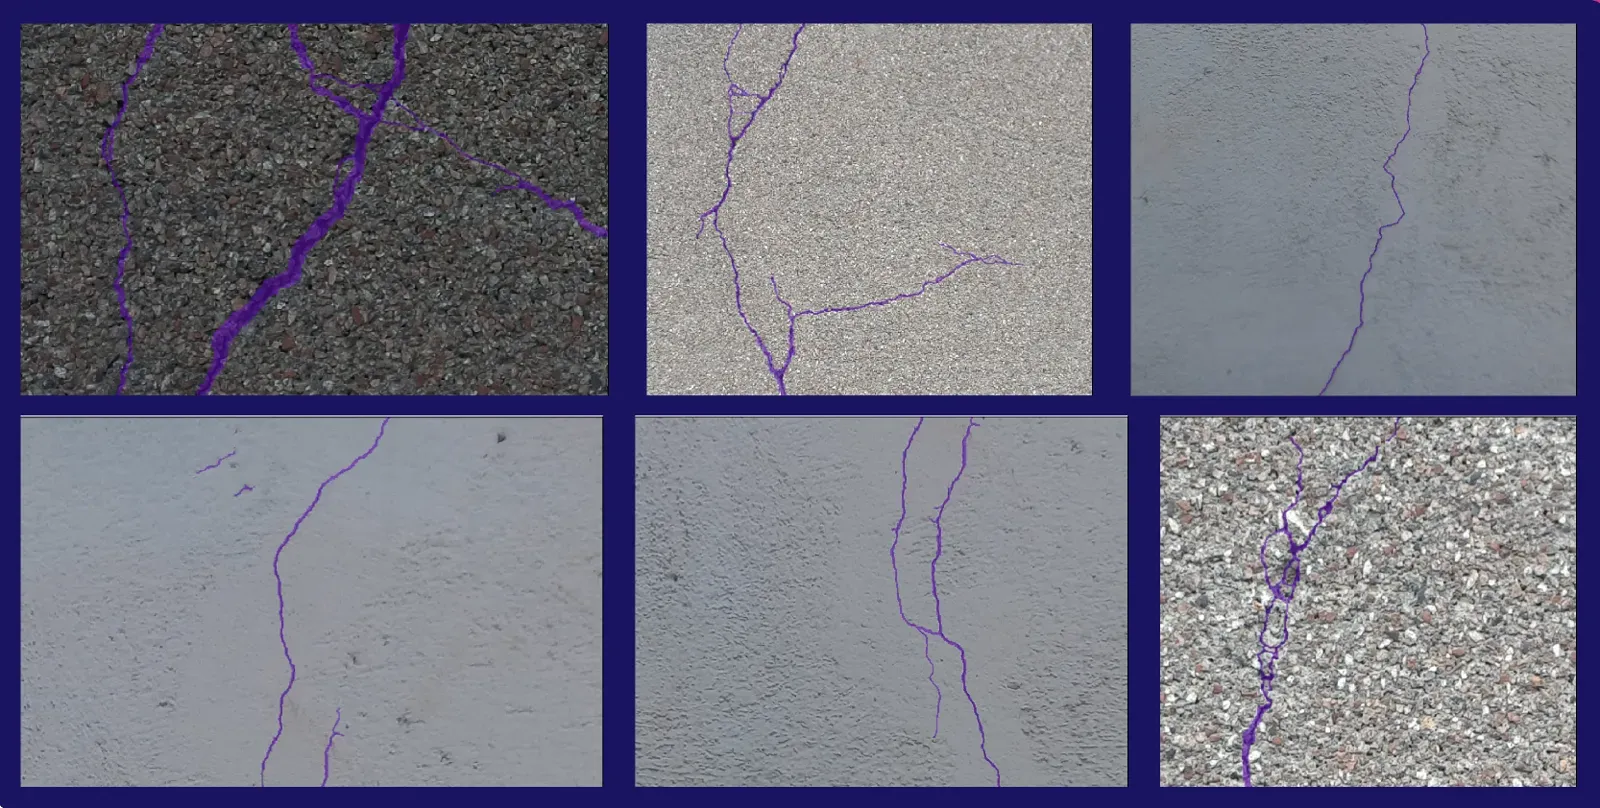 Overview of the training dataset
A separate validation dataset containing 70 unseen similar images will be used to assess the performance of our model.
| Item | Value |
|---|---|
| Task | Crack segmentation on images |
| Model | RITM (interactive segmentation) |
| Training images | 628 annotated |
| Validation images | 70 unseen |
| Hardware | Your own GPU computer connected to Supervisely |
| Coding | None |
How do you connect your GPU? (Step 1)
Easily link your GPU-enabled computer to Supervisely for free model training and evaluation. Just execute a single command in your terminal. See the concise video guide for setup details. The training will be done on your machine. Watch the video guide on how to do that (MacOS, Ubuntu, any Unix OS or Windows).
How do you train the RITM model? (Step 2)
Our example uses the RITM model, chosen for its ease of training on smaller datasets and precise mask predictions
Launch the Train RITM app from the project’s dashboard to configure and monitor the training process. Click the [⫶] button → Neural Networks → RITM → Train RITM
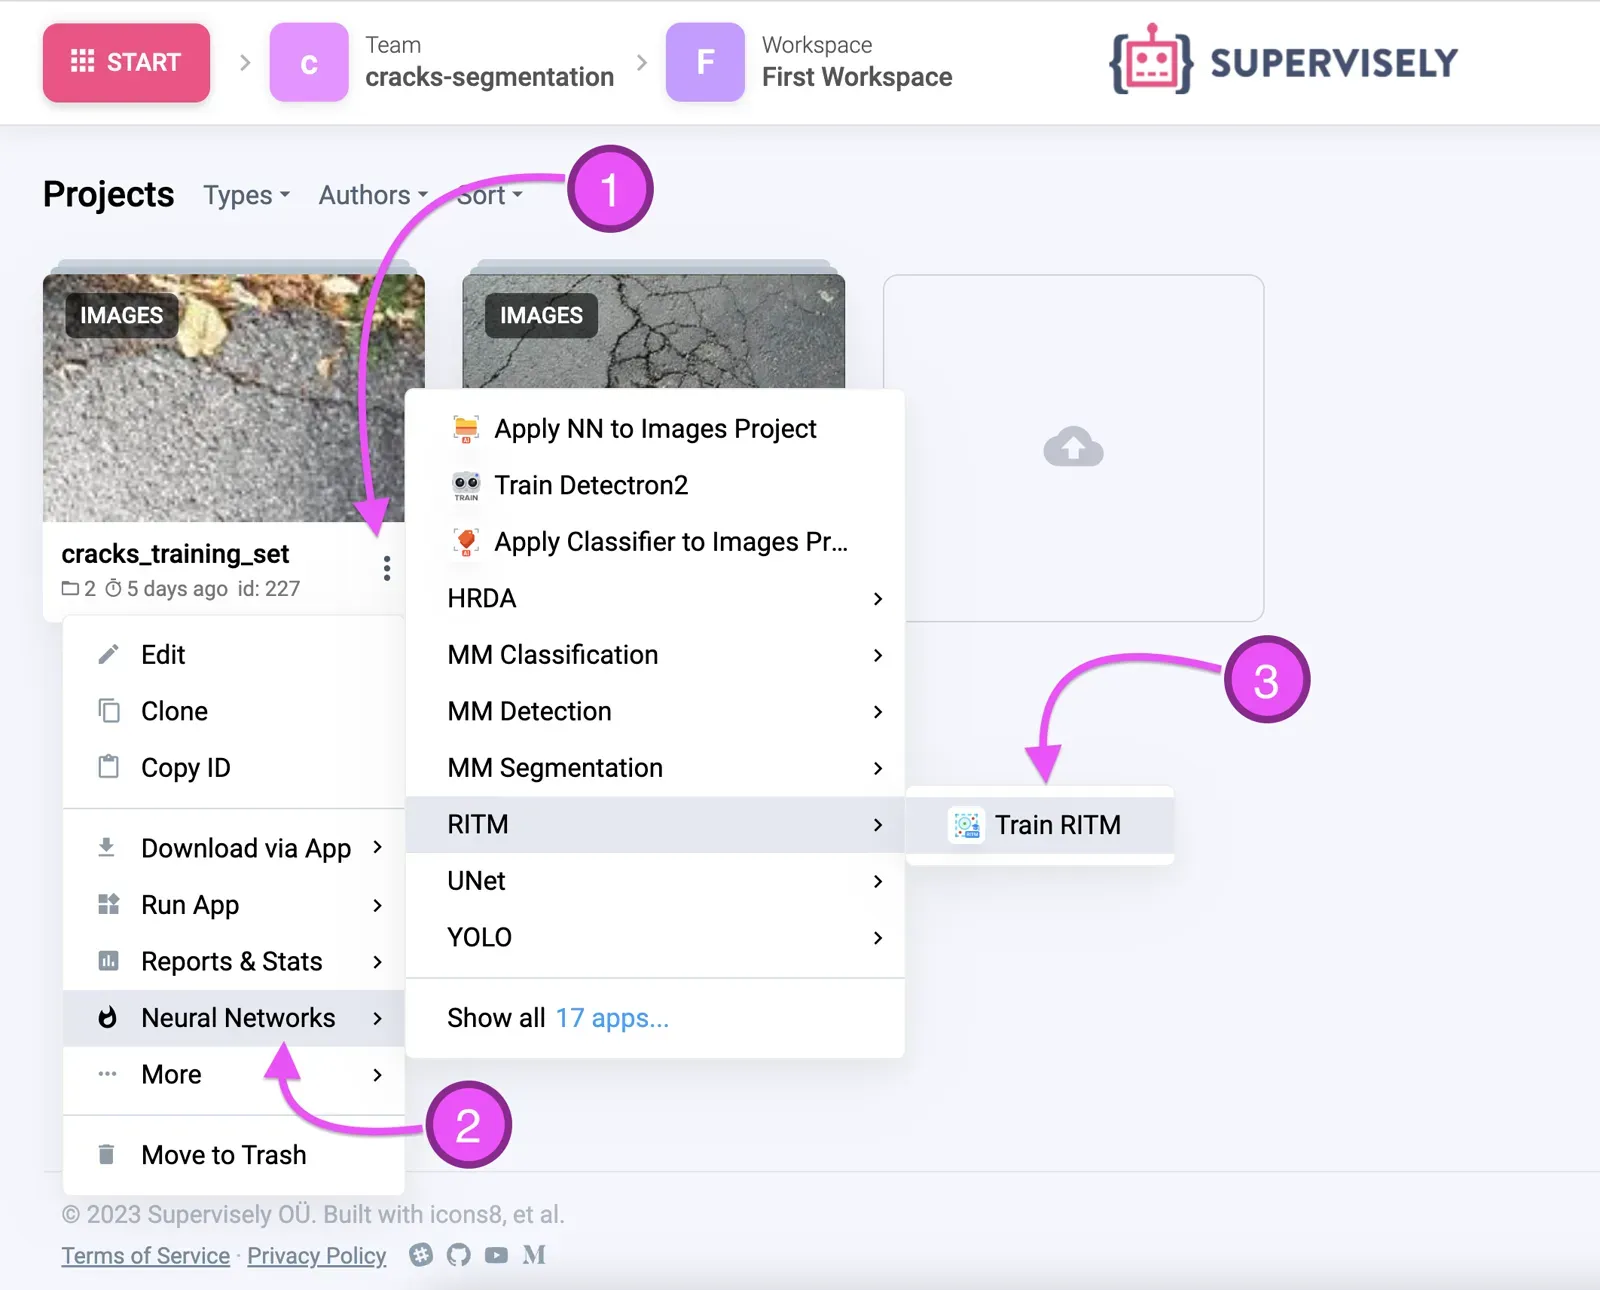 Launch train RITM
To initiate the training, follow the instructions in the wizard. Configure the essential training settings and hyperparameters. Default values will work, but you can experiment with the training parameters and observe how it impacts the performance of your custom model. For a more comprehensive guide, consult the video tutorial.
The training process generates a range of artifacts, including model weights (checkpoints), logs, charts, as well as visual representations of training batches and predictions. You can access these items through a link in the training dashboard.
How do you serve the trained model? (Step 3)

RITM interactive segmentation SmartTool
State-of-the art object segmentation model in Labeling Interface
Within the Supervisely platform, Neural Networks become an integral part through two distinct App types: train and serve. The train App constitutes an interactive dashboard for training, as discussed in the preceding step, whereas the "serve" App empowers users to deploy a trained model. Consequently, predictions from the model are obtained and can be accessible by the user. For more available Apps related to Neural Networks, visit the Neural Networks page.
To evaluate the performance of our trained model using our custom data, we must put it into action. To do so, we need to run serving app by navigating to Neural Networks → Images → Interactive Segmentation → Serve RITM Supervisely App:
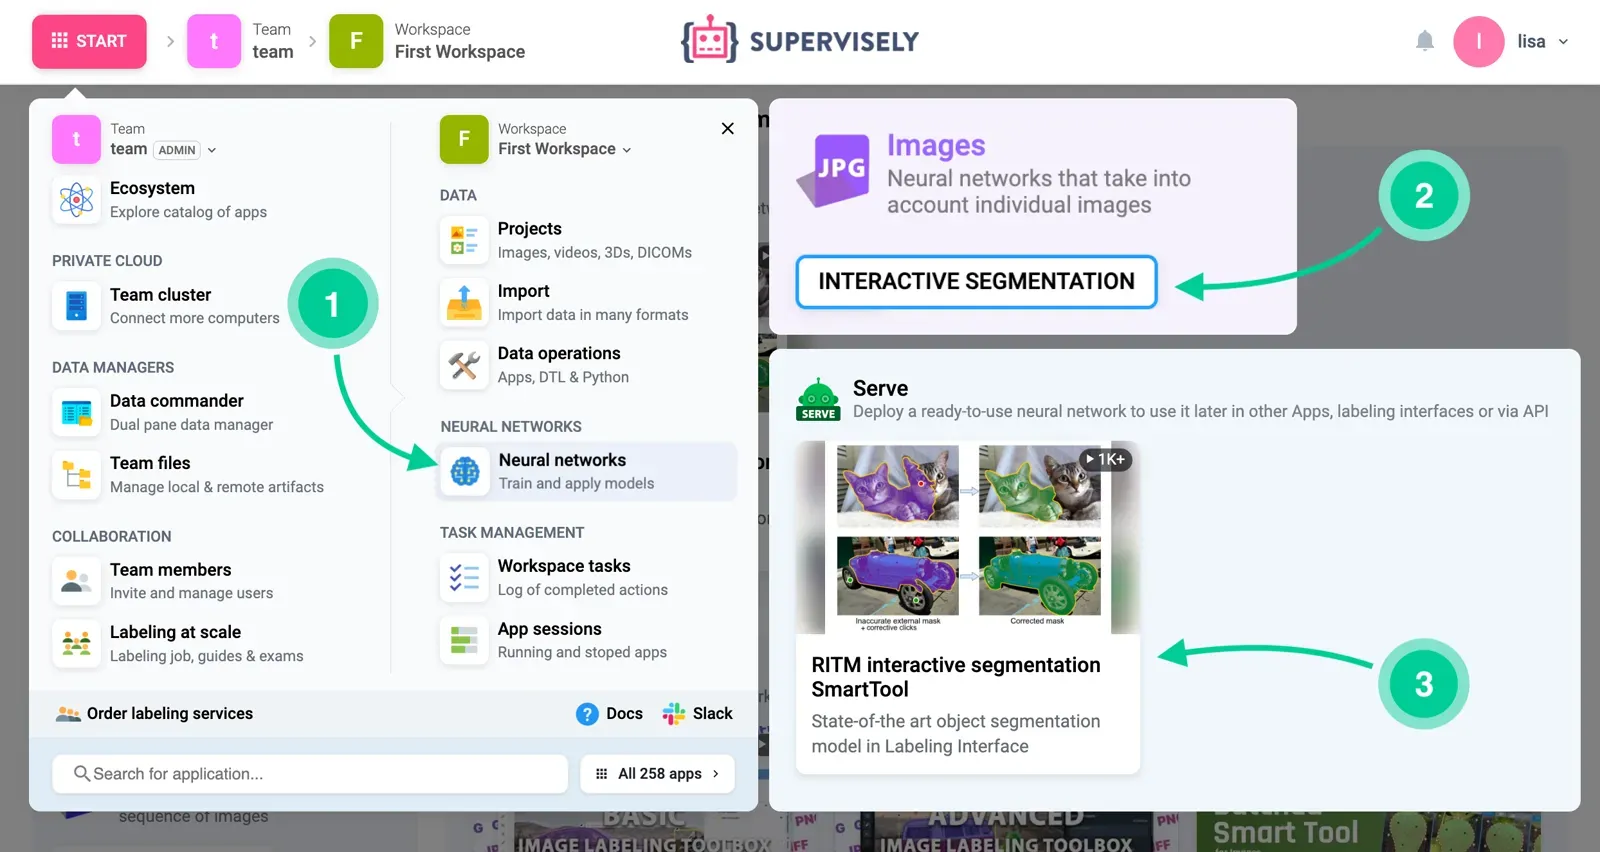 How to run the RITM serving App
We need to choose custom model in the App window and provide the path to the best checkpoint achieved during training. Additionally, in order to distinguish this smart tool from the others which might be deployed, let’s name it cracks. As usual, you need to select a computer for the deployment device and click run. That’s it!
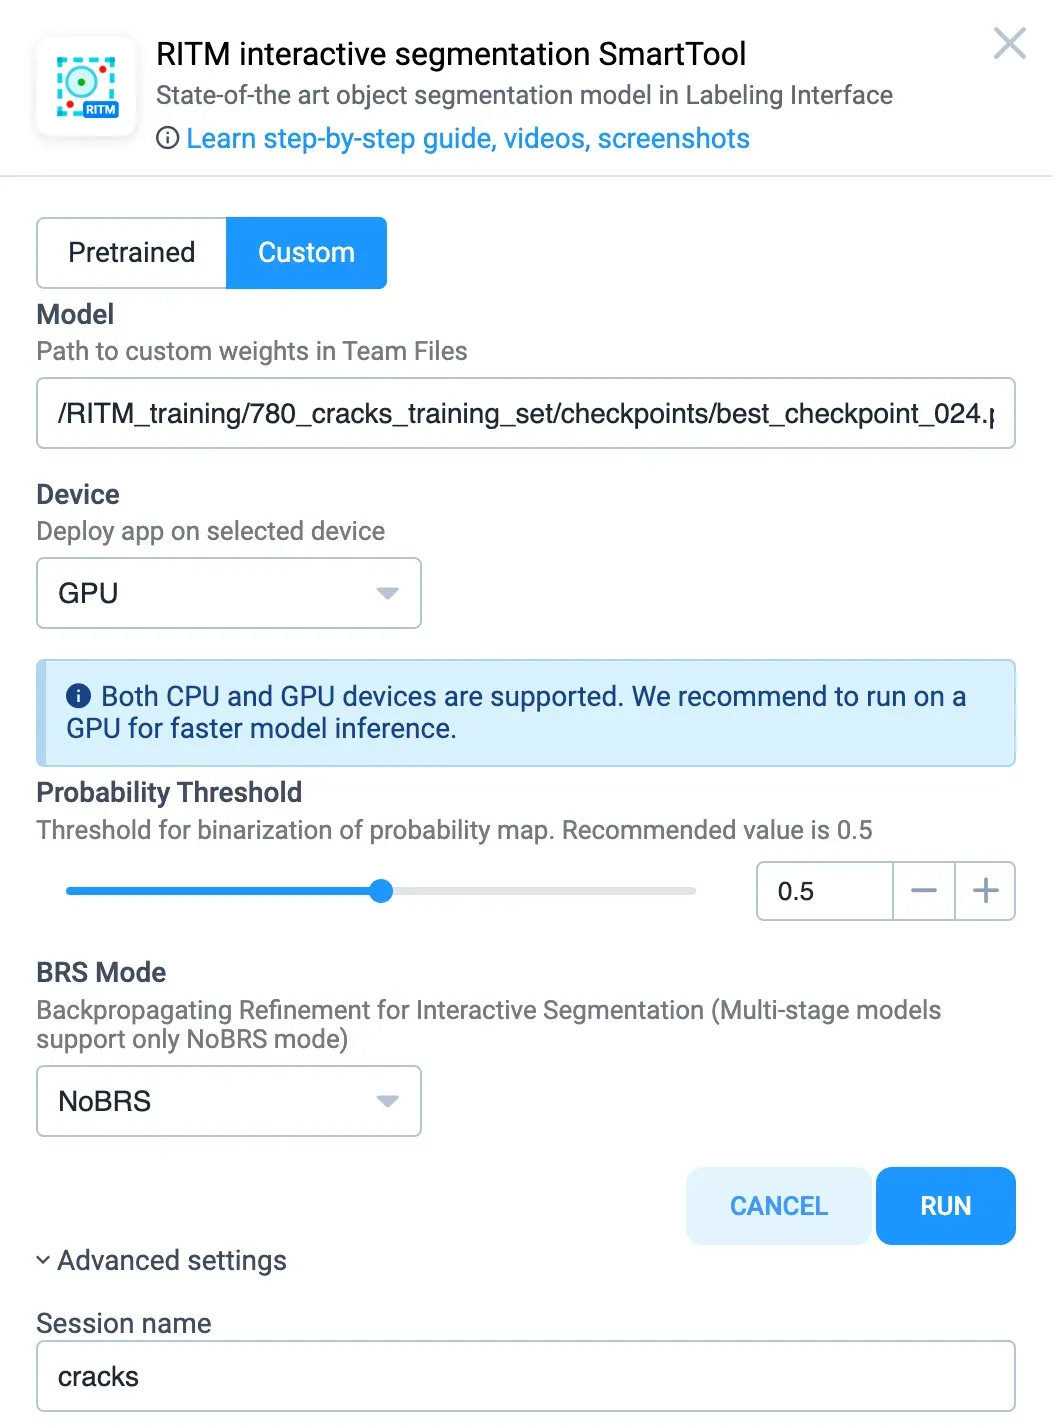 Provide a custom checkpoint you want to run
How well does the custom smart tool segment cracks?
As evident from the results, the model demonstrates impressive performance on the test data. While some feedback to the model might still be necessary, the outcomes undoubtedly justify the efforts invested!
To enhance the precision of the predictions even further, we can simply add more positive 🟢 and negative 🔴 dots by interacting with the tool.
Conclusion
The custom tool we built for spotting cracks using interactive segmentation is particularly useful for tricky images where accurate automation is needed for each picture. The quality of the training data plays a big role in getting good results. Luckily, training the model in Supervisely is incredibly simple and doesn't require any coding – it can be done in just a few minutes. This approach proves to be effective for achieving high-precision cracks segmentation.
Frequently asked questions
What is interactive segmentation?
It is a semi-automated way to segment objects. You mark the object with positive (green) dots, add negative (red) dots where the model is wrong, and the model refines the mask. It works on one image at a time during annotation.
Why train a custom model for cracks?
In our experiment, general-purpose models struggled with cracks, which are thin, irregular and vary a lot across surfaces. Training on a small crack dataset gave a model that fits the task.
How much data did you use?
628 annotated crack images for training and a separate set of 70 unseen similar images for validation.
Which model did you train?
RITM, chosen for its ease of training on smaller datasets and its precise mask predictions.
Do I need to write code?
No. You connect a GPU computer with one terminal command, run the Train RITM app, then run the Serve RITM app with your best checkpoint.
Where else is crack segmentation used?
Beyond infrastructure and construction: aerospace, automotive, energy, manufacturing and medical imaging such as bone fractures.